Just like we were able to receive the data from the serial port using the Serial Monitor built into ArduinoIDE we can receive it with other application that have the capability. One important thing to remember is that only one application can be connected to a given serial port at a time. This means that if you are viewing the data with the Serial Monitor you won't be able to recieve it in, for example, Unity. You will need to close one connection to enable the other.
Unity is a popular game development platform. It uses C# as it's main programming language. C# included a powerful Serial communication library and is capable of receiving serial data. To enable this functionality in Unity you must first make sure you're using the correct configuration. In the top menu bar go to Edit -> Project Settings and under Player -> Other settings find Api Compatibility Level and set it to .NET Framework.

To receive serial data we'll need to create a script in Unity and attach it to a game object in the environment. At the top of the script we need to decalare that we'll be using a serial port connection by adding this line:
using System.IO.Ports;
We will need to declare a SerialPort object in the code and store a new Serail connection there for access. The object will need the name of the serial port and the baud rate for the speed of communication. We will also need recepticles for the string of characters we'll be receiveing from the serail port and for an array of values we'll get after we parce the string. Place the following code inside your class, before the Start method:
SerialPort connection = new SerialPort("nameOfSerialPort", 9600);
public string dataString;
public string[] values;
There are several ways to obtain the name of your serial port. You can check the ArduinoIDE setting and copy it from there.
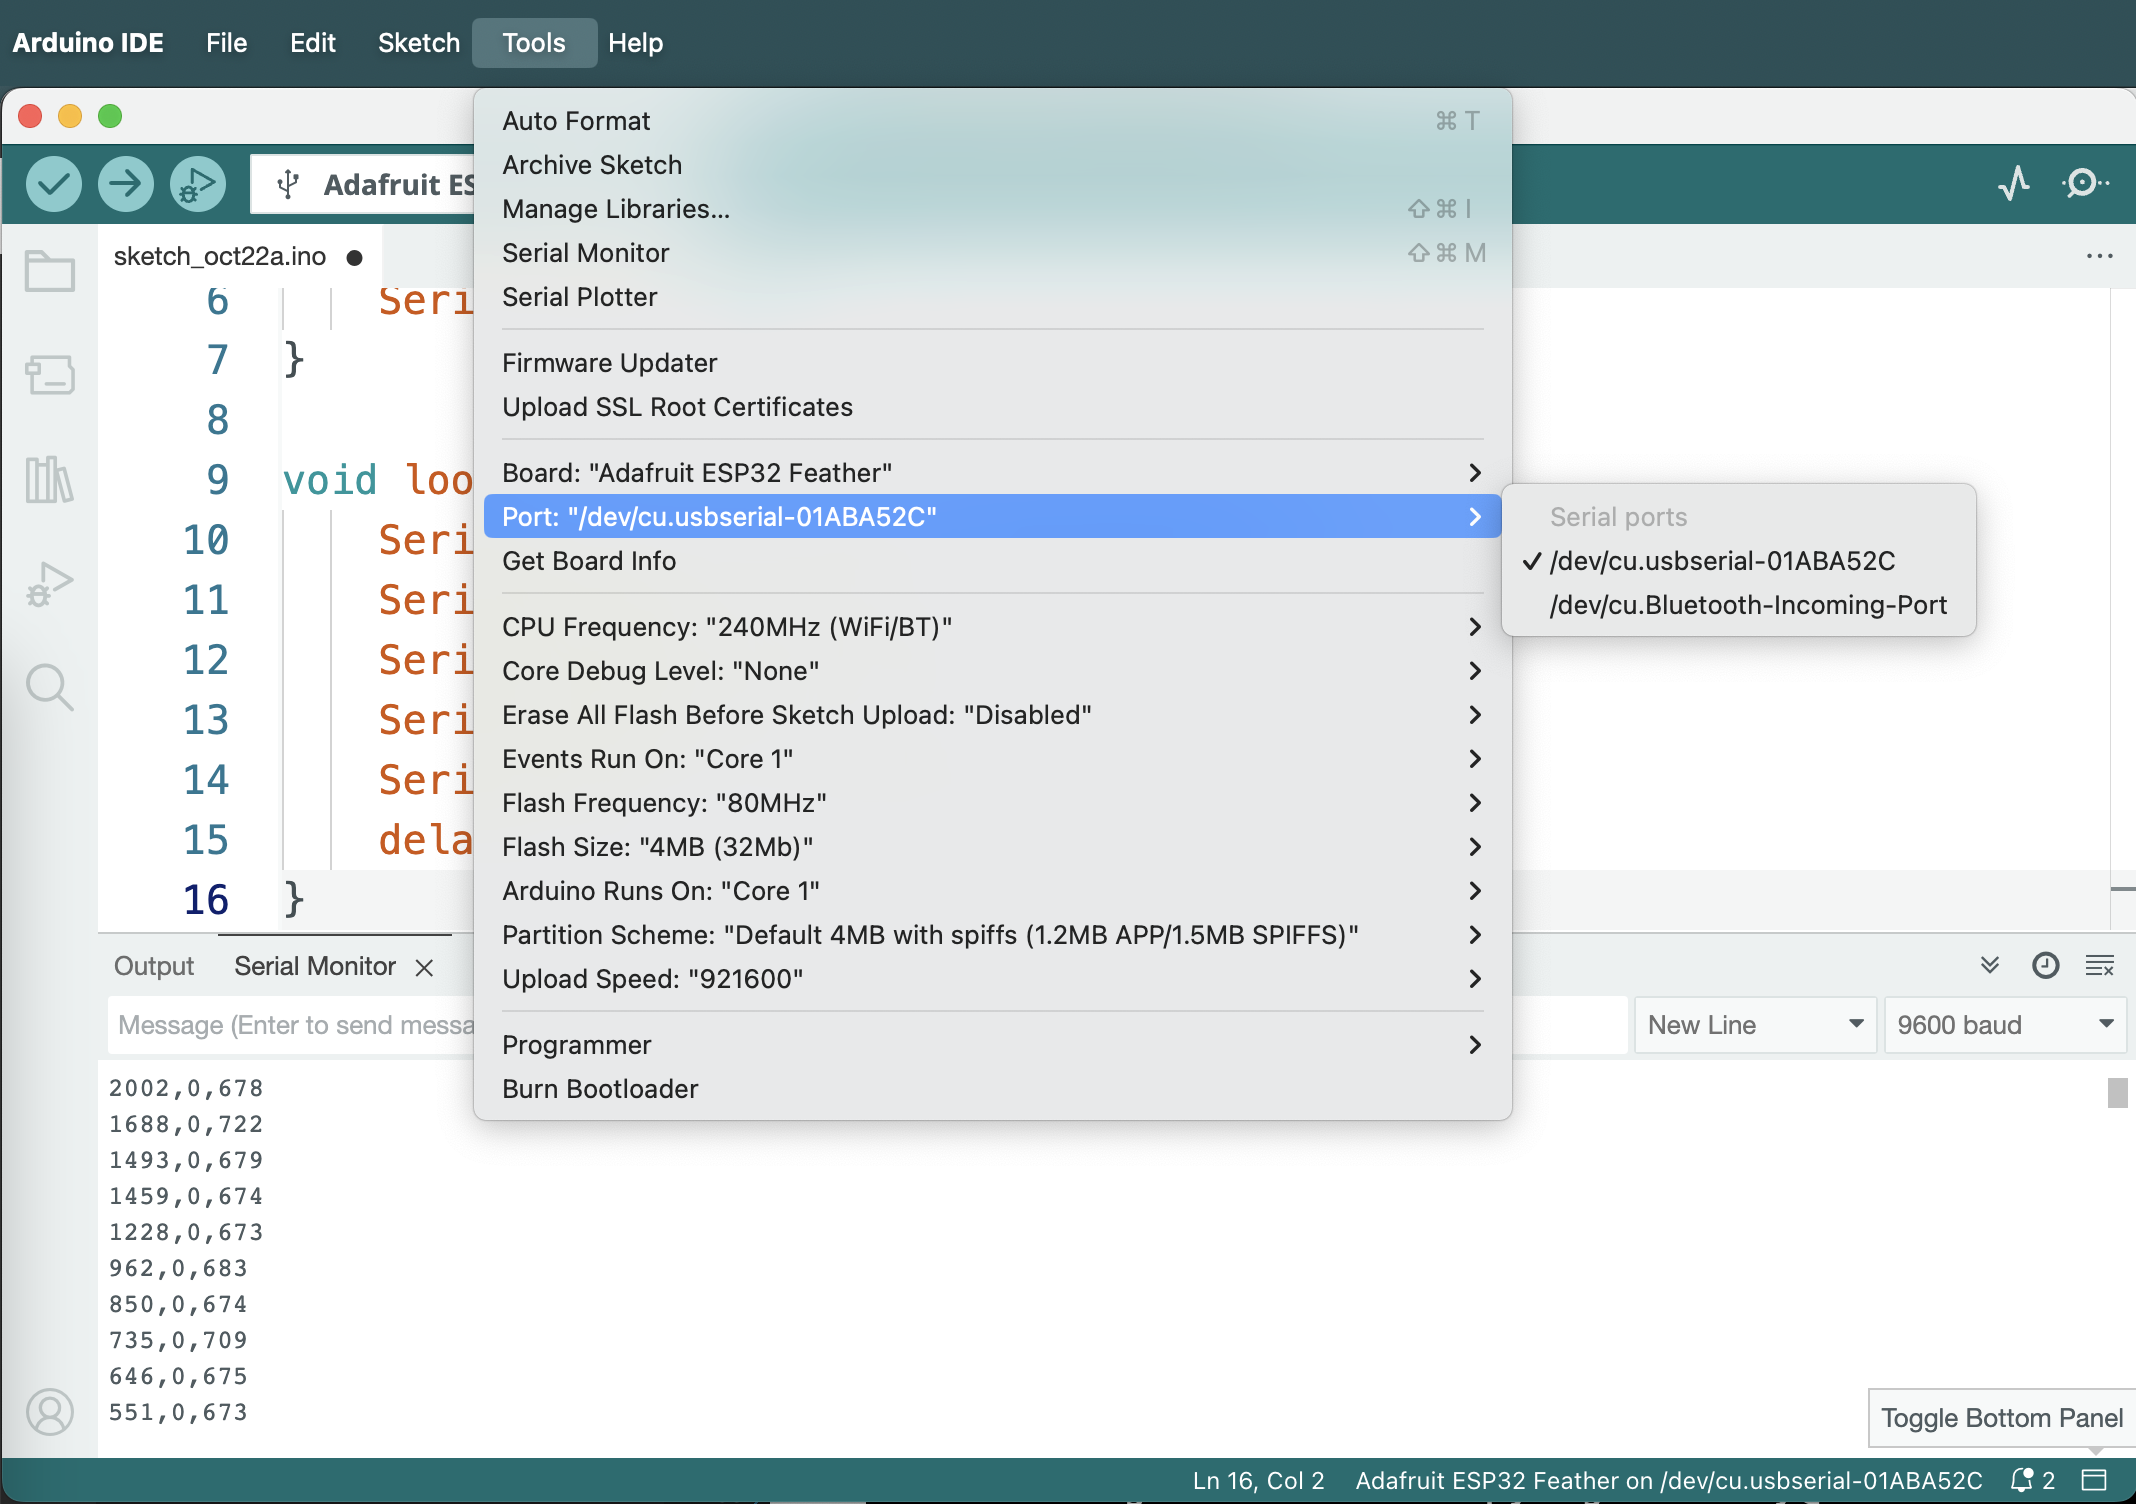
This tends to be easier for Windows users, since in that OS the port names assume the format COM*, e.g. COM4. On *nix systems (Mac OS and Linux) the names tend to be longer and more convoluted conforming to the format /dev/cu.* as in the image above. The other parameter that go into the Serial object instantiation is the baud rate 9600, which should match the baud rate we established in the code for ESP32.
In the Start method we'll need to open the connection. Please remember that only one serial connection toa serial port is allowed at any time, so check and close Serial Monitor in Arduino IDE or any other connections to your port that might be open.
void Start()
{
    connection.Open();
}
If we're only sending and receiving one value the task is trivial - read the value that comes in as a String, convert it whichever format we need and apply it accordingly. In the example below we're using the value of a potentiometer connected to an ESP32 board. In the Update method we first read the line of serial data, terminating at the new line characer. Then we use TryParse method from the integer implementation (we need using System; line to make it work) to attempt to convert the transmission from a string into a number. If the attempt is succcessful we create a Vector3 from the values and use it to set the scale of the object to which this script is attached.
using System.Collections;
using System.Collections.Generic;
using UnityEngine;
using System.IO.Ports;
using System;

public class serialController : MonoBehaviour
{
    SerialPort connection = new SerialPort("nameOfSerialPort", 9600);
    private string dataString;
    private int dataValue;
    // Start is called before the first frame update
    void Start()
    {
        connection.Open();
    }

    // Update is called once per frame
    void Update()
    {
        dataString = connection.ReadLine();
        if(Int32.TryParse(dataString, out dataValue))
        {
            transform.localScale = new Vector3(dataValue, dataValue, dataValue);
        }

    }
}
In the case when we have 2 or more values coming from the serial port we need to perform a few additional steps. In the example below we'll use the value of a potentiometer (the first value in the message) to set the scale, the value of the button (the second parameter) - to determine whether it will be red or blue, and the value of a photoresistor (the third) - to determine the horizontal position of the circle. We'll split the string from the port into an array of values using the delimiter we established in our code for the ESP32, - in our case ','. Then we will attempt to convert the values into numbers and apply those numbers as intended.
using System.Collections;
using System.Collections.Generic;
using UnityEngine;
using System.IO.Ports;
using System;

public class serialController : MonoBehaviour
{
    SerialPort connection = new SerialPort("nameOfSerialPort", 9600);
    private string dataString;
    private string[] values;
    private int dataValue;
    // Start is called before the first frame update
    void Start()
    {
        connection.Open();
    }

    // Update is called once per frame
    void Update()
    {
        dataString = connection.ReadLine();
        values = dataString.Split(',');

        if(Int32.TryParse(values[0], out dataValue))
        {
            transform.localScale = new Vector3(dataValue, dataValue, dataValue);
        }

        if(Int32.TryParse(values[1], out dataValue))
        {
            if(dataValue == 1)
            {
                transform.GetComponent().material.color = Color.blue;
            }
            else
            {
                transform.GetComponent().material.color = Color.red;
            }
        }

        if(Int32.TryParse(values[2], out dataValue))
        {
            transform.position = new Vector3(dataValue, transform.position.y, transform.position.z);
        }

    }
}